
MacBook Neo Storage Full? How to Make 256GB Last
Quick Answer
A 256GB MacBook Neo fills up because macOS, its recovery system, the built-in apps and about 14GB of Apple Intelligence models take their share before you save a single file, and System Data, app leftovers and swap grow from there. To make it last, check real free space with df -h / in Terminal, turn on Optimize Mac Storage for Photos and iCloud Drive, clear caches and old installers that rebuild themselves, uninstall apps together with their leftovers, and move large libraries to an external SSD plugged into the faster USB 3 port. Then keep 30-40GB free. The Neo's 8GB of memory relies on swap files stored on the same disk, and macOS updates need far more room than their download size.
The MacBook Neo brought a lot of people to the Mac this year. Apple announced it in March 2026, and in November said it sold more Macs in fiscal 2026 than in any year before, with the Neo one of the two models driving it. Most of those Neos are the 256GB model, and that storage cannot be upgraded after you buy it.
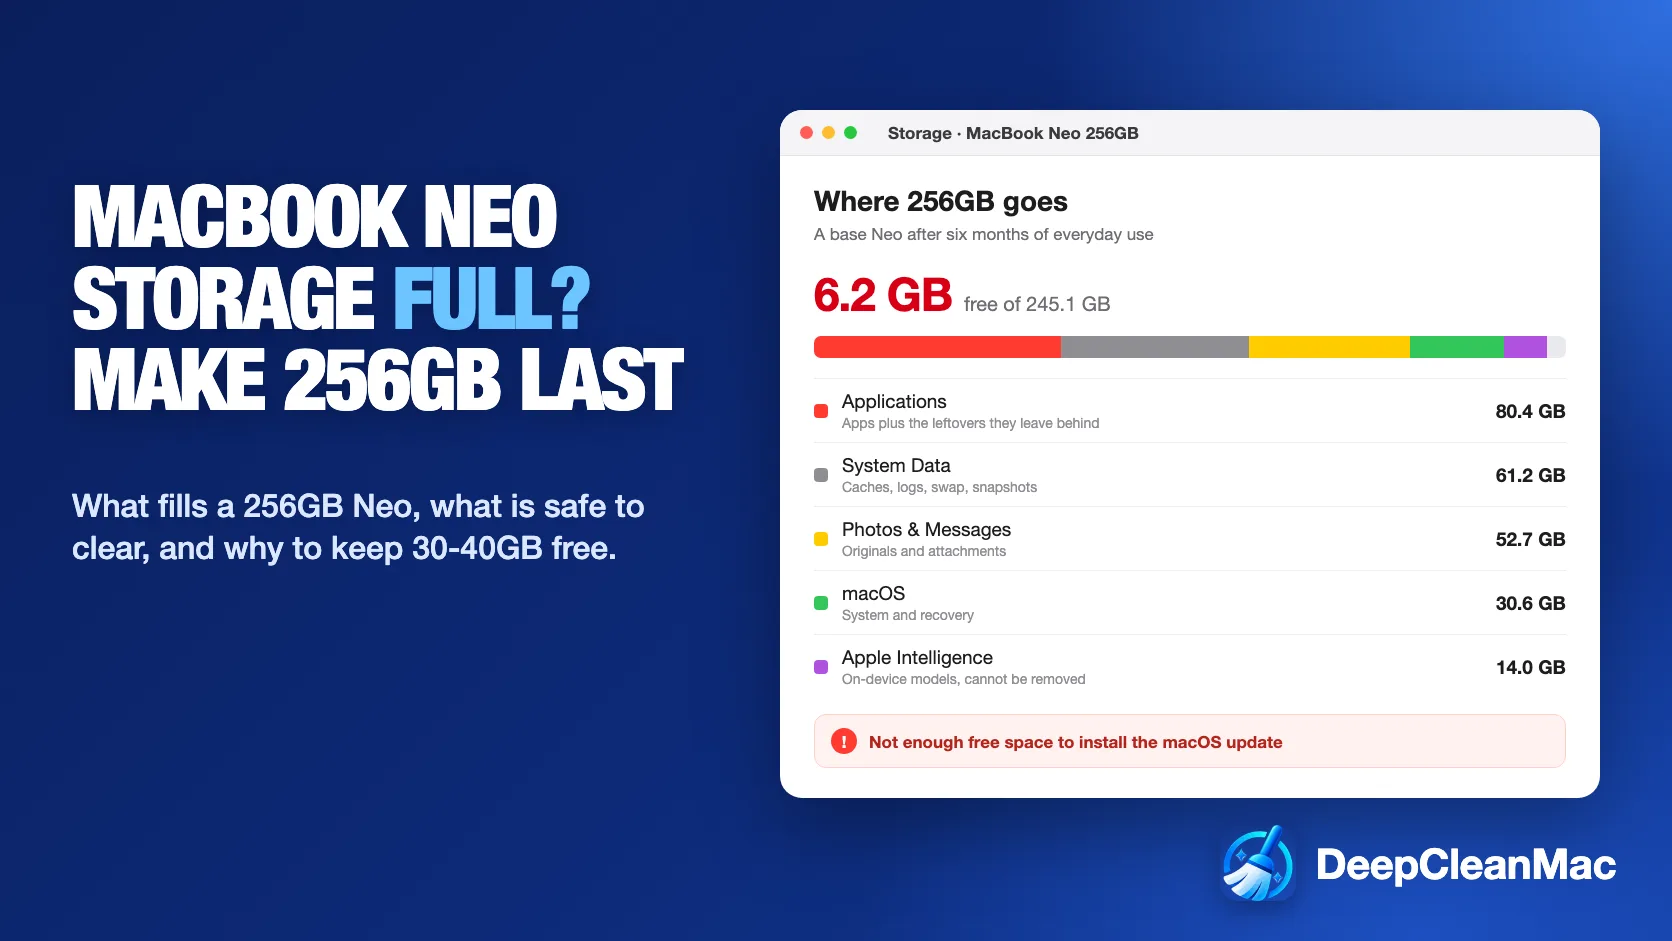
256GB is enough for many people, and reviewers who use the Neo for documents, browsing and streaming say so. The problem is that you never get 256GB to use, and what you do get shrinks. One owner who wrote up six months with the base model ended up with about 6GB free, with Applications at about 80GB and System Data at about 60GB, and could not install a macOS security update until they deleted files and apps.
If your MacBook Neo storage is full, or heading that way, this guide is for you. You will learn what actually fills a 256GB MacBook Neo, the five steps that free the most space safely, why the Neo's 8GB of memory makes a full disk worse than on other Macs, and how much free space to keep so updates never fail. If you are still choosing between the 256GB and 512GB models this Black Friday, the FAQ covers that too.
5 Steps to Free Up Space on a 256GB MacBook Neo
Method 1: Measure What Is Really Using the Disk
Step 1: Open Apple menu > System Settings > General > Storage and wait for the bar to finish calculating. Note the available figure and the three largest categories.
Step 2: Open Terminal from Applications > Utilities and run: df -h / The Avail column is the space you can write to right now. Storage settings can count purgeable space as available, so df is the more honest number.
Step 3: See which folders in your home folder are largest: du -sh ~/* 2>/dev/null | sort -h
Step 4: Look inside your Library, where most hidden growth lives: du -sh ~/Library/* 2>/dev/null | sort -h | tail -15
Step 5: Check whether Time Machine local snapshots are holding space: tmutil listlocalsnapshots /
On a 256GB Mac these numbers decide the order of everything else. If Photos or Messages is the largest item, step 2 does most of the work. If Applications is the largest, go to step 4. If System Data is large and df shows much less free space than Storage settings, the space is usually held by caches, swap or snapshots, which step 3 covers. Do not delete anything from ~/Library because of its size alone: many of the largest folders there hold app data you still need.
Method 2: Let iCloud Hold the Originals of Photos, Files and Messages
Step 1: Open Photos > Settings > iCloud and choose Optimize Mac Storage. Full-resolution originals stay in iCloud, the Mac keeps smaller versions, and originals download when you open them.
Step 2: Open System Settings > [your name] > iCloud > iCloud Drive and turn on Optimize Mac Storage, so files you have not opened recently are kept in iCloud and downloaded on demand.
Step 3: If your Desktop and Documents folders are large, turn on Desktop & Documents Folders in the same iCloud Drive settings so they can be optimized too.
Step 4: In Messages > Settings > General, change Keep messages from Forever to 1 Year. Years of photos and videos in conversations often add up to several gigabytes.
Step 5: In Music and TV, remove downloads of things you can stream: right-click the album, playlist or show and choose Remove Download.
For most people this is the biggest lever on a 256GB Mac, because photos, videos and message attachments grow every week and almost never shrink by themselves. It is not free: the free iCloud tier is 5GB, so a real photo library needs an iCloud+ plan. It also depends on your connection, because originals download when you open them. If you would rather not pay for iCloud, the external SSD in step 5 does the same job for your Photos library.
Method 3: Clear the Files That Rebuild Themselves
Step 1: Empty the Trash. Deleted files keep using space until you do.
Step 2: Open Downloads in Finder, switch to List view and sort by Size. Delete .dmg and .pkg installers for apps you have already installed, and archives you have already opened.
Step 3: Check /Applications for an Install macOS app left behind after an upgrade. At around 18GB it is one of the biggest single wins on a 256GB Mac.
Step 4: Quit your apps, then in Finder press Command-Shift-G, go to ~/Library/Caches and delete the contents of folders belonging to apps you recognise. Leave the folders themselves in place.
Step 5: If you ever backed up an iPhone or iPad to this Mac, open ~/Library/Application Support/MobileSync/Backup and remove backups for devices you no longer have or that already back up to iCloud.
Step 6: Restart. macOS removes swap files and many temporary files at startup and recalculates purgeable space.
Caches come back, and that is fine. The goal is not an empty ~/Library/Caches but getting back the gigabytes held for apps you rarely use and data nobody will read again. On a Neo, one browser with a large cache and one messaging app with years of media can easily account for 10GB. Never delete files inside /System or the top-level /Library folders by hand.
Method 4: Uninstall Apps You Do Not Use, Leftovers Included
Step 1: Open Applications in Finder, switch to List view, then choose View > Show View Options and turn on Calculate all sizes. Click the Size column to sort.
Step 2: Look for large apps you no longer open: games, video and audio editors, trial software, and Apple apps such as GarageBand and iMovie if you never use them.
Step 3: If an app came with its own uninstaller, use it. Otherwise drag the app to the Trash.
Step 4: In Finder press Command-Shift-G and check ~/Library/Application Support, ~/Library/Containers, ~/Library/Group Containers and ~/Library/Preferences for items named after the app you removed. Delete those too.
Step 5: If you removed GarageBand, also remove its sound library from /Library/Application Support/GarageBand and /Library/Audio/Apple Loops. It can run to several gigabytes.
Applications was the largest category in the six-month 256GB Neo write-up, at about 80GB. Dragging an app to the Trash removes the app bundle and leaves its support files, caches and containers in your Library, and they are sometimes larger than the app itself. On a big drive that is untidy. On a 256GB drive it is space you will want back, and it builds up with every app you try and delete.
Method 5: Move Big Libraries to an External SSD on the Right Port
Step 1: Use an external SSD, not a spinning hard drive. A portable 1TB USB-C SSD typically costs about the same as Apple's 256GB-to-512GB upgrade and holds four times as much.
Step 2: Plug it into the Neo's USB 3 port. The two USB-C ports are not the same: one runs at up to 10Gb/s and the other at USB 2 speed, 480Mb/s, which is far too slow for a photo or video library. Reviewers identify the fast port as the one closer to the hinge.
Step 3: If the drive is not already formatted as APFS, open Disk Utility from Applications > Utilities and erase it as APFS. This deletes everything on the drive.
Step 4: To move your Photos library, quit Photos, drag Photos Library from ~/Pictures to the SSD, then hold Option while opening Photos and choose the copy on the SSD. Once it opens correctly, delete the copy on the internal drive.
Step 5: Move other large folders that do not need to be on the Mac all the time: finished video projects, audio projects, old archives and virtual machine images.
When the files are genuinely yours and genuinely large, an external SSD is the honest answer to a 256GB Mac. Two cautions. Keep the drive connected when you use what is on it, because Photos and other apps cannot open a library on a drive that is unplugged. And an external SSD is not a backup: if your files now live only on that drive, back it up too, for example with Time Machine to a second drive.
What Fills a 256GB MacBook Neo
These are the usual suspects on a base Neo, roughly in the order people run into them. Sizes vary a lot with how you use the Mac, so treat them as a guide and measure your own with the commands in step 1.
| What Takes the Space | Typical Size and What You Can Do |
|---|---|
| macOS, recovery and built-in apps | Tens of gigabytes before you install anything, and not removable. This is why a 256GB Mac never shows 256GB free. Most owners report somewhere around 200GB left for their own files once setup and the first downloads finish. |
| Apple Intelligence models | About 14GB measured on a MacBook Neo running macOS 27, downloaded automatically. There is no supported way to delete them, and turning features off does not give the space back. Plan around it rather than fight it. |
| Photos, videos and Messages attachments | Grows every week with no upper limit. The largest recoverable category for most people, through Optimize Mac Storage in Photos, a one-year limit in Messages, or a library moved to an external SSD. |
| Applications and their leftovers | About 80GB in one six-month 256GB Neo report. Recoverable by uninstalling apps you do not use, along with the support folders, containers and preferences they leave in your Library. |
| System Data | About 60GB in the same report. A mix of caches, logs, swap files, Time Machine local snapshots and app data. Partly recoverable: caches and old logs clear safely, swap clears on restart and snapshots thin with tmutil. |
| Downloads, installers and device backups | Varies widely, and is fully recoverable. A leftover Install macOS app is around 18GB on its own, and a single old iPhone backup can be larger than that. |
Why 8GB of Memory Makes a Full Disk Worse
Every MacBook Neo has 8GB of memory, with no option for more. When the apps you have open need more than that, macOS compresses what it can and writes the rest to swap files on the internal SSD. That is normal and usually invisible. One owner who used the 256GB model for six months found that opening 20-30 apps at once really taxed it, and now treats the Neo as a machine for one to five apps at a time.
Swap is where low memory and low storage meet. Swap files live on the same 256GB disk as everything else, grow while you work and are removed when you restart, and Storage settings counts them as part of System Data. A long session with dozens of browser tabs can use several gigabytes of swap. With plenty of free space you never notice. With 8GB free, the swap files and the update you are trying to install are competing for the same few gigabytes.
When free space gets very low, macOS can warn that your system has run out of application memory and ask you to quit apps, even though the real shortage is disk space for swap. Apps slow down, the spinning beach ball appears more often and updates fail. The fix is not another tool running in the background. It is a margin: leave swap room to work, restart now and then to clear it, and quit apps you are not using.
That is why the number to watch on a Neo is free space, not used space. As a practical rule, 30-40GB free keeps a Neo comfortable. Below about 20GB you start to feel it, and below 10GB updates and swap start to fail.
Habits That Keep a 256GB MacBook Neo From Filling Up
Keep 30-40GB free, not 5GB
That is roughly 15% of the drive. It gives swap room to work, lets point updates install without a cleanup first, and means one holiday's worth of photos does not push you over the edge. When free space drops below about 20GB, clean up before it becomes urgent rather than after an update fails.
Plan for the next macOS upgrade now
A point update such as 27.2.1 needs a few gigabytes plus working room. A full upgrade is a different size of problem: the macOS 27 Golden Gate installer is about 18GB, Apple's stated minimum is about 35.5GB free, and 60GB is a safer target. On a 256GB Neo, start clearing space weeks before the next major release, not the night it arrives.
Stream instead of downloading
Downloaded music, TV shows, podcasts and offline films from streaming apps are some of the easiest gigabytes to lose track of. Unless you regularly work without Wi-Fi, stream them and keep downloads for trips, then remove them when you get back.
Restart once or twice a week
A Neo that only ever sleeps can go weeks without a restart, and swap files and temporary files keep growing in the meantime. A restart clears them and gives macOS a fresh look at purgeable space. It takes a minute and is the cheapest cleanup there is.
Use one main browser
Every browser keeps its own cache, profile, extensions and offline site data, often several gigabytes each. Running Safari, Chrome and another browser side by side triples that cost. Pick one for daily use and clear the data of the ones you only open occasionally.
Check storage once a month
Two minutes with System Settings > General > Storage or df -h / catches growth while it is still small. A monthly check turns a full disk from an emergency in the middle of an update into a routine you barely notice.
How DeepCleanMac Helps on a 256GB MacBook Neo
Steps 1, 2 and 5 are settings and decisions only you can make, and they do not need a tool. Steps 3 and 4 are where the time goes on a 256GB Mac, because the space is spread across dozens of hidden Library folders and nothing labels a leftover as a leftover.
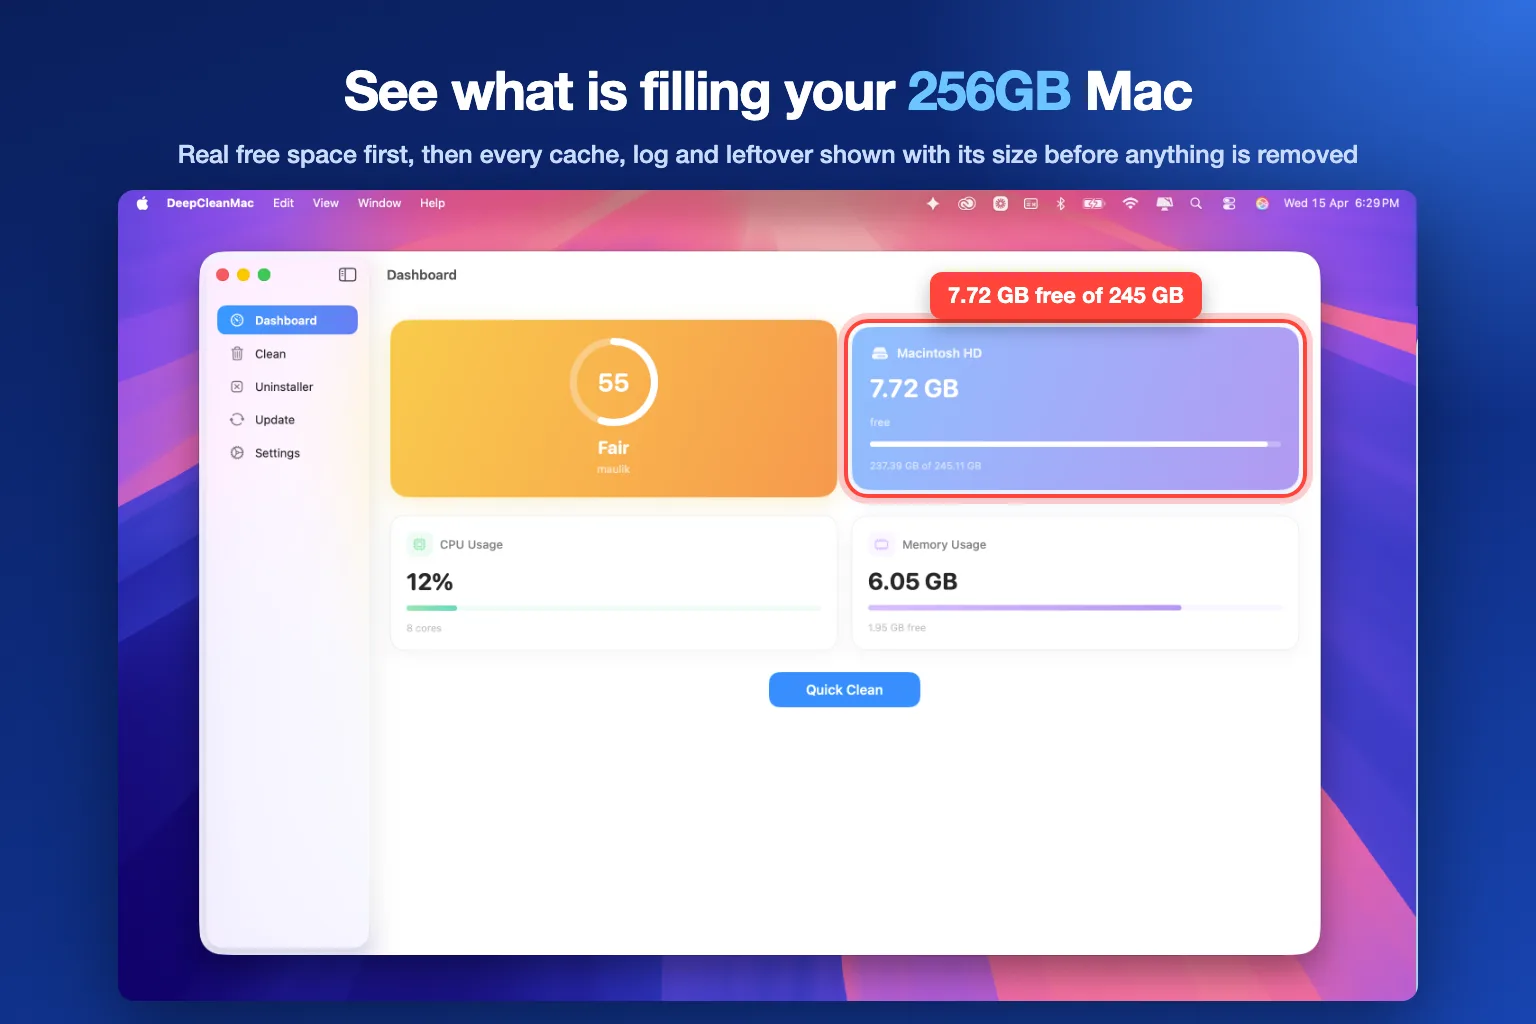
DeepCleanMac's Cleaner scans 200+ hidden locations in under 30 seconds and shows what it found, with sizes, before anything is removed: user and system caches, logs, crash reports, browser caches, leftover installers, Mail downloads and old iPhone backups. The Uninstaller removes apps together with the Application Support folders, containers and preferences they leave behind. Disk Analyzer and Duplicates find the large and repeated files worth moving to an external SSD, and the dashboard shows real free space next to purgeable space and the number of local snapshots, so you can see at a glance what is holding your disk.
Two honest limits. DeepCleanMac does not delete Apple Intelligence models, because they sit in a SIP-protected system location and macOS downloads them again, and it does not delete Time Machine snapshots, which tmutil handles. On a Mac where every gigabyte counts, it also stays small: about 21MB installed.
The scan is free and shows you the full list with sizes before you decide anything. A license is $5 a year or $9 for a lifetime. Download DeepCleanMac and get your Neo back above the line.
Frequently Asked Questions
Is 256GB enough on a MacBook Neo?
▾
For browsing, documents, streaming and schoolwork, yes, as long as your photos and large files live in iCloud or on an external drive. It is tight for big photo libraries, video editing, games or many large apps. Expect around 200GB usable after setup and Apple Intelligence, and plan to keep 30-40GB of that free.
Can I upgrade the storage on a MacBook Neo?
▾
Not officially. You choose 256GB or 512GB when you buy, and Apple offers no storage upgrade afterwards. The 1TB upgrades shown in YouTube teardowns involve swapping soldered storage chips on the logic board, which is specialist work and voids the warranty. For most people an external SSD on the USB 3 port is the practical way to add space.
Should I buy the 256GB or 512GB MacBook Neo?
▾
Buy 512GB if you keep a large photo library on the Mac, edit video, play games or do not want to pay for iCloud+ storage. It also adds Touch ID, which the 256GB model lacks. If your files already live in the cloud and you mostly work in a browser, 256GB works, and an external SSD covers the rest.
How much free space does a MacBook Neo need to update macOS?
▾
For point updates, aim for at least 20GB free so the update has room to unpack. For a full macOS upgrade such as Golden Gate, Apple's stated minimum is about 35.5GB and 60GB is a safer target. Installers need space well beyond their download size to stage the new system, which is why updates fail on nearly full 256GB Macs.
Why is System Data so large on my MacBook Neo?
▾
System Data includes caches, logs, swap files, Time Machine local snapshots and app data that do not fit Apple's other categories. With 8GB of memory, the Neo writes more swap than Macs with more RAM, and it all counts here. Restart to clear swap, clear old caches, and check for snapshots with tmutil listlocalsnapshots /.
Can I delete Apple Intelligence to free up space on a MacBook Neo?
▾
There is no supported way. On macOS 27 the models, about 14GB on a Neo, download automatically and stay even if you turn individual features off. They sit in a SIP-protected system location and macOS downloads them again if they go missing. Treat them as part of the system's footprint and free space elsewhere.
Does a full disk slow down a MacBook Neo?
▾
Yes, and more noticeably than on Macs with more memory. With 8GB of RAM the Neo relies on swap files on the internal SSD, and when free space is very low macOS has less room for them. You may see beach balls, out of application memory warnings and failed updates. Keeping 30-40GB free avoids most of it.
A 256GB MacBook Neo is not a mistake, but it is a Mac you manage rather than ignore. Measure first with df -h / and du so you know whether photos, apps or System Data is the real problem. Let iCloud or an external SSD on the USB 3 port hold the big libraries, clear the caches and installers that rebuild themselves, and uninstall apps together with their leftovers. Then keep 30-40GB free, because the Neo's 8GB of memory needs room for swap and every macOS update needs room to unpack. Do that and a full disk on your MacBook Neo becomes a rare event rather than a monthly one. Run a free DeepCleanMac scan to see how much your Neo is holding onto.
Free download. Scans 200+ hidden locations in seconds.